Table of Contents
Moths in pantry cupboards are almost always Indian meal moths, and they announce themselves late. By the time you spot a small brown moth on the cabinet wall or webbing matting a bag of rice, the larvae have been feeding for weeks. These are a food pest, not the clothes moths that infest a closet, and if you are seeing moths elsewhere in the house the source is still almost always the kitchen. Solving it needs no exotic products, but it is a full sequence rather than a single trick, and skipping a step lands you back here in a month or two. Expect three to four weeks of doing every step. Skip the two things that waste your time: mothballs and insecticides do not belong near food, and herb sachets or bay leaves do nothing to clear an infestation, with no extension authority backing them even as a preventive. What actually works is removing the food source, killing the eggs, and sealing everything that goes back in.
1. Inspect Pantry and Toss Infested Food
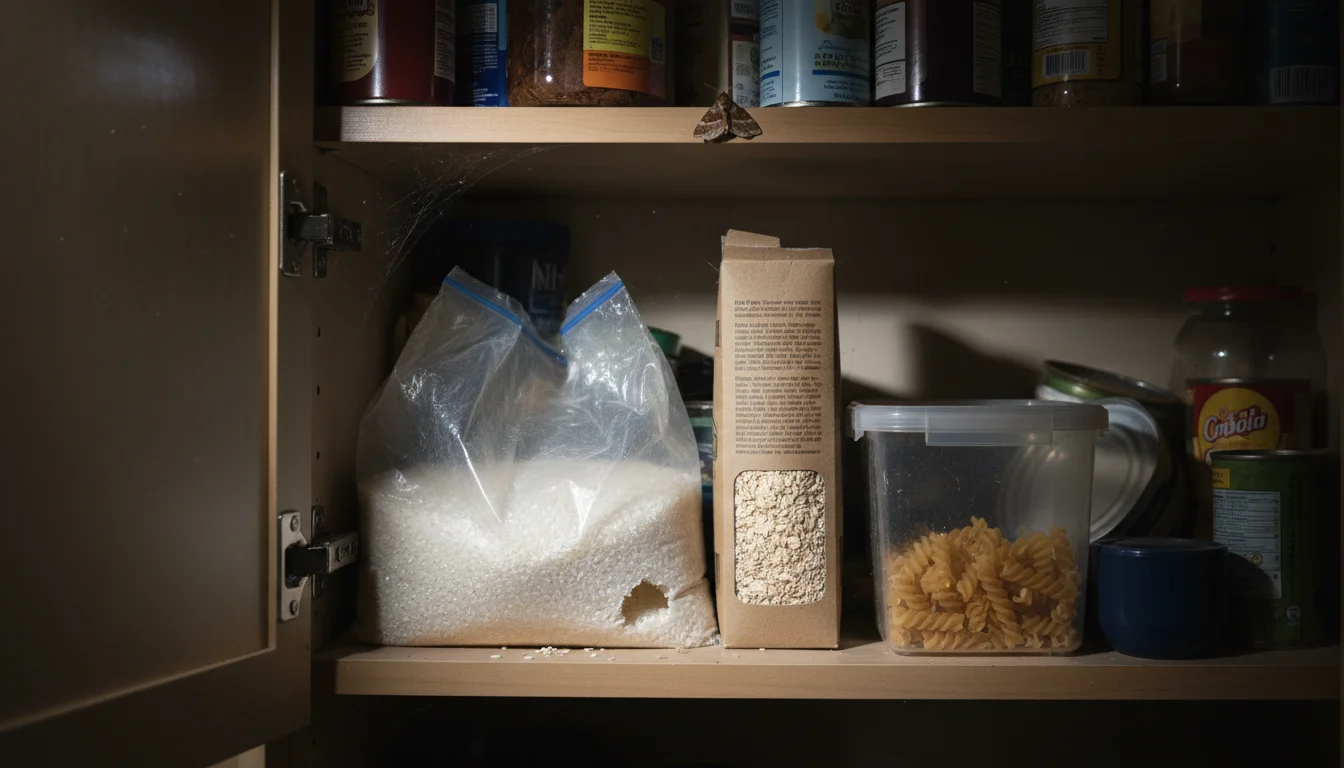
Start with a complete clear-out. Pull every bag, box, and container out of the pantry and check each one for webbing, tiny holes in packaging, clumped or matted grains, or larvae crawling in the seams. Common targets are cereal, rice, flour, pasta, dried beans, nuts, birdseed, pet food, spices, dried fruit, tea, and chocolate.
Do not try to salvage partly infested items. The eggs are microscopic and you cannot spot them all. Check unopened packages too, because larvae chew through cardboard and thin plastic, and people routinely find them breeding inside sealed boxes of pasta and in the oatmeal container. Pet food and birdseed are the most overlooked source of all, so open the dog-food bin and the birdseed sack and look. Be ruthless. One missed box restarts the whole problem.
2. Vacuum Pantry Cracks and Crevices
Once the shelves are empty, vacuum before you wash. A cloth wipes flat surfaces but skips the cracks, and cracks are exactly where eggs, larvae, cocoons, and loose grain hide. Fit the crevice tool and work every corner, shelf bracket, hinge, and the joint where shelves meet the wall. Run it along the front lip of each shelf and into screw holes and seams. Pantry moths survive on almost nothing, so a few crumbs left in a corner can restart the problem.
Empty the vacuum straight away, seal the bag or canister contents in plastic, and put it in the outside bin. Eggs and larvae survive the trip into a warm canister and hatch there. Leave a full vacuum sitting in the house and it becomes the next breeding site, which is exactly how people end up with a second infestation weeks after they thought they were done.
3. Clean Food Storage Containers with Hot Water and Soap
Everything that was in the pantry gets washed: every container, jar, bin, lid, and shelf. Use hot soapy water and scrub, paying attention to the grooves in lids and the joints where egg clusters hide. Rinse well and dry completely before anything goes back.
For wire shelving, use a scrub brush to get into the channels. Wooden shelves are trickier, because eggs work their way into the grain, so scrub them and let them dry fully. If you use shelf paper, throw it out and start fresh, because eggs get underneath it and are nearly impossible to remove otherwise. Get the top edges of containers and the undersides of lids where they seal. The goal is removing every trace of eggs, webbing, and food residue, not just making the shelves look clean.
4. Wipe the Cracks with White Vinegar
After the vacuum and the soapy wash, a white-vinegar wipe is an extra pass at the cracks the other two steps miss. The mild acid cuts greasy residue and food film left in the seams.
Mix equal parts white vinegar and water in a spray bottle, or use it undiluted on stubborn buildup. Spray or wipe into corners, seams, shelf brackets, and the joints where shelves meet the wall, let it sit a few minutes, then wipe dry. The smell fades as it dries, so it will not linger on the food you put back. Treat vinegar as a cleaner, not a repellent: it lifts what is left behind, but it will not drive off adults or stop new eggs on its own.
5. Freeze What You Keep to Kill the Eggs
Anything you want to keep, and anything new you buy for weeks afterward, goes through the freezer. Cold at normal home-freezer temperature kills every life stage, eggs included, if you leave items in long enough. A full week is the safe rule.
Seal grains, flour, nuts, birdseed, and any salvageable dry goods in a bag, press out the air, and freeze for a week before it goes into the pantry. Do the same with new bags of flour and rice as you bring them home, because infestations often arrive from the store already inside the packaging. Keep the item sealed so it does not pick up freezer burn or moisture, and let it come back to room temperature before you open it.
6. Lock Down Food Storage
The whole reason this happened is that ordinary packaging does not stop insects. Moths and larvae get through cardboard, thin plastic bags, and loose-fitting lids, and once they reach a food source the population climbs fast.
Going forward, everything loose goes into hard containers with tight-fitting lids: glass jars, heavy plastic with gasket seals, or metal tins. That means flour, sugar, rice, pasta, cereal, crackers, oats, dried beans, nuts, and pet food. Glass and metal are the safest choices, and heavy plastic with a gasket seal works too; what fails is thin plastic bags and loose-fitting lids, which larvae chew through or crawl past. Mason jars suit smaller quantities and gasketed bins handle bulk. Put ripe fruit in the refrigerator rather than on the counter. A fully sealed pantry removes their reason to be there.

7. Group Remaining Items in One Area to Monitor
After cleaning and restocking, consolidate everything uncontaminated into one zone of the pantry. This makes a recurrence far easier to catch, because you are watching a small defined area instead of the whole cabinet.
Keep the grouping in place for two to three weeks and check daily for fresh webbing, larvae, or adults. Look at container lids, the undersides of shelves, and the corners where shelves meet walls, which are the spots eggs get missed. If you see any activity, something got through and you go back to the inspection step. Three weeks of nothing and you are clear to spread things back out.
8. Use Pheromone Traps to Catch Males
Pheromone traps are sticky cards coated with synthetic female moth scent. Male moths fly in and get stuck, which breaks the breeding cycle. Hang or stand one near your consolidated items.
Be clear about what they do. Traps monitor and thin the population; they do not clear an infestation on their own. Their real value is as an early-warning system through the monitoring window: if the trap keeps filling, something is still breeding and you have missed a food source. If it goes quiet for a few weeks, you are winning. Follow the package directions for placement and replacement, and check it weekly; the lures commonly stay effective for about three months.
9. Take Out Trash Regularly
The kitchen bin is the last piece. When you purge infested food, bag it and take it straight to the outdoor bin. Do not let contaminated food sit in the kitchen trash, and do not park it in the garage, because larvae in a warm sealed bag keep developing and a bin left in a warm space becomes a second infestation site.
During the active phase and for a few weeks after, take the kitchen trash out daily and double-bag heavily infested material if the outdoor bin is a walk away. Break down and remove food cardboard and paper bags on the same schedule, because they harbor eggs too. The point is getting the food source out of the building, not moving it to the next room.